DIY Camp Shower For Your Car

Staying fresh and clean on the road without getting a hotel room can be tricky. But if you build your own car-top ‘solar’ camp shower, you can stay squeaky clean wherever you roam. This DIY is a bit challenging, but with the right tools and materials, you’ll be ready to hit the road in no time. Tools: Hacksaw Drill with 1/8″, 3/4″ and 3/8″ bits Marker Materials: One 10′ length of 4″ Schedule 40 ABS pipe (this will depend on how much water you want the shower to hold) Two 4″ ABS end caps One 4″ T-joint ABS fitting with threaded top opening 4″ ABS cleanout cap for T-joint One 1/2″ brass locknut One flat rubber O-ring Two canoe foam blocks (optional: these go on your vehicle’s crossbars and keep the shower more secure and held off the bars; alternately you can just tie the shower directly to the bars) One Schrader valve from an aluminum wheel; available at any tire/wheel shop ABS cleaner/primer ABS cement Waterproof silicone sealant Sandpaper Tie-down straps Petroleum jelly Schrader bike pump One 3/4″ hose spigot Hose with nozzle
DIY camp shower" width="1024" height="630" /> DirectionsStep 1: How much water do you need? First, you need to decide how much water you want the shower to hold, while considering the overall weight once it’s filled. We chose to make our shower about 6′ long, which holds about 4.5 gallons of water. The amount of shower time your water capacity gives you depends on the psi you pump the shower to and the type of nozzle you’re using; we got about 15 minutes of shower time. Step 2: Cut your main ABS pipe. Measure the 10′ length of ABS to 5′ 6″ and mark with the marker. Use the hacksaw to cut at your measurement. Measure and mark a 6″ length from the remaining pipe and cut at the mark. You will now have a 5′ 6″ length, a 6″ length and an extra piece. 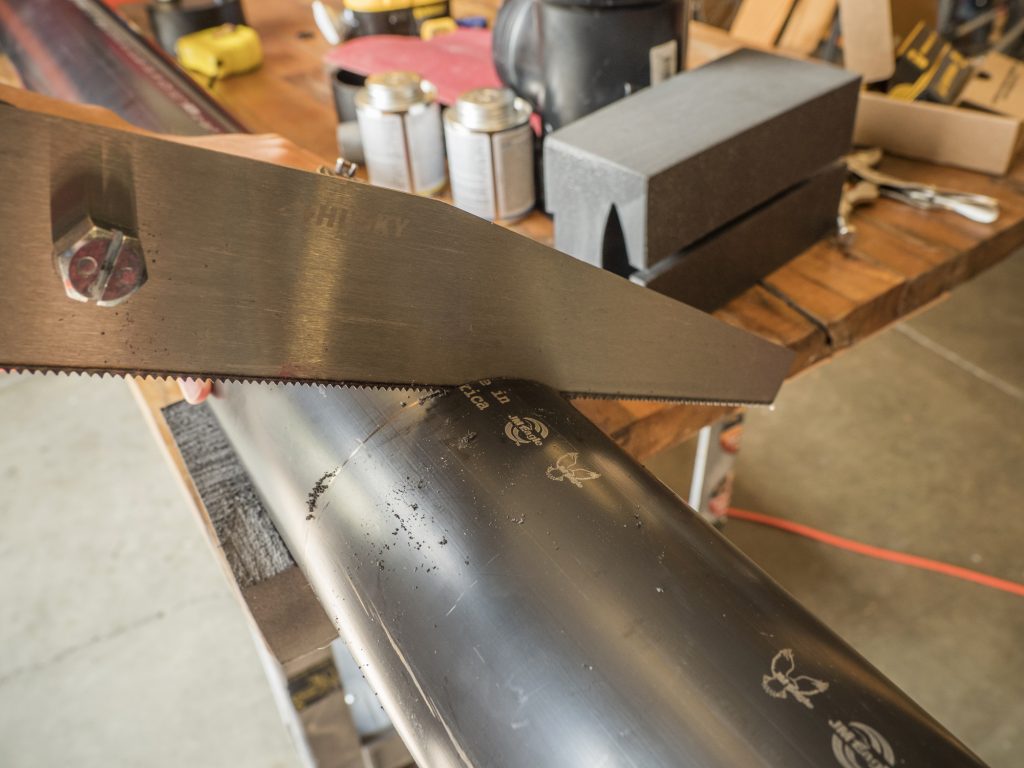 Step 3: Cut foam blocks (optional). If using the foam canoe blocks, position one end of the 4″ ABS pipe on the side of one of the blocks without the bar cutouts. Keep the bottom of the pipe as close to the middle of the block as possible without overlapping the bar cutout. Mark the pipe’s outline with a marker. Use the hacksaw to cut out the semicircle of foam. Repeat with the other block.
 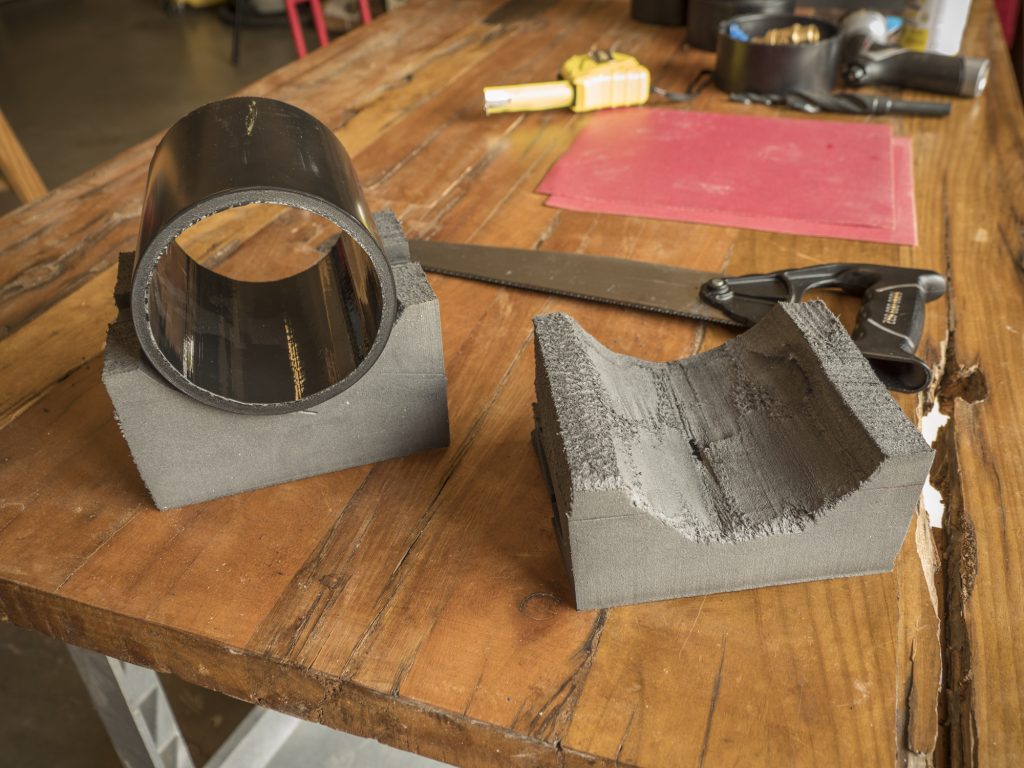 Step 4: Drill a hole for the spigot. Place the brass locknut inside one of the end caps as close to the outside edge as possible without touching. Mark the inside circumference with a marker. Remove the locknut and mark a dot in the middle of the circle. Starting with a 1/8″ bit and working up to a 3/4″ bit, drill a hole at the dot through the end cap. You want the finished hole to be 3/4″ across, just wide enough for the spigot to fit through. We had to ream the opening a bit for the spigot to fit.
 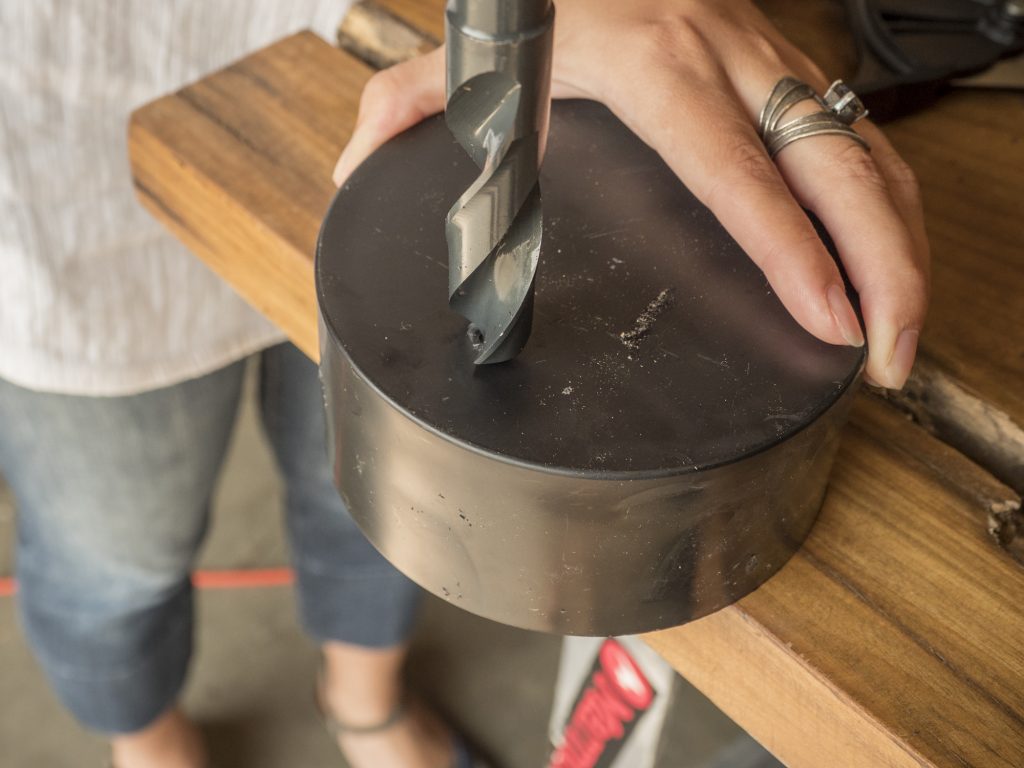 Step 5: Install the Schrader valve. Mark a dot directly above the spigot hole, about 3/4″ from the edge of the end cap. Using the 3/8″ bit, drill a hole at the dot. Run the valve through from back to front, so it sticks out the smooth face side. Place the flanged washer narrow side first onto the front of the valve stem. Holding the washer and valve in place with on hand, use the other to apply a bead of silicone around the front opening around the valve stem.
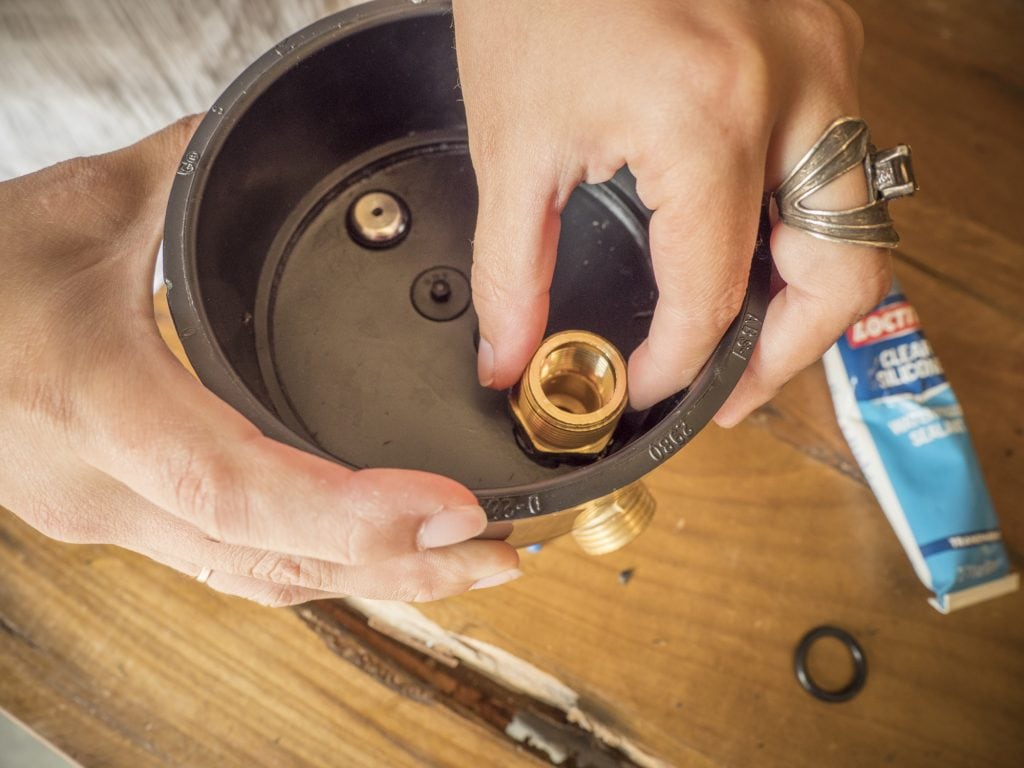
 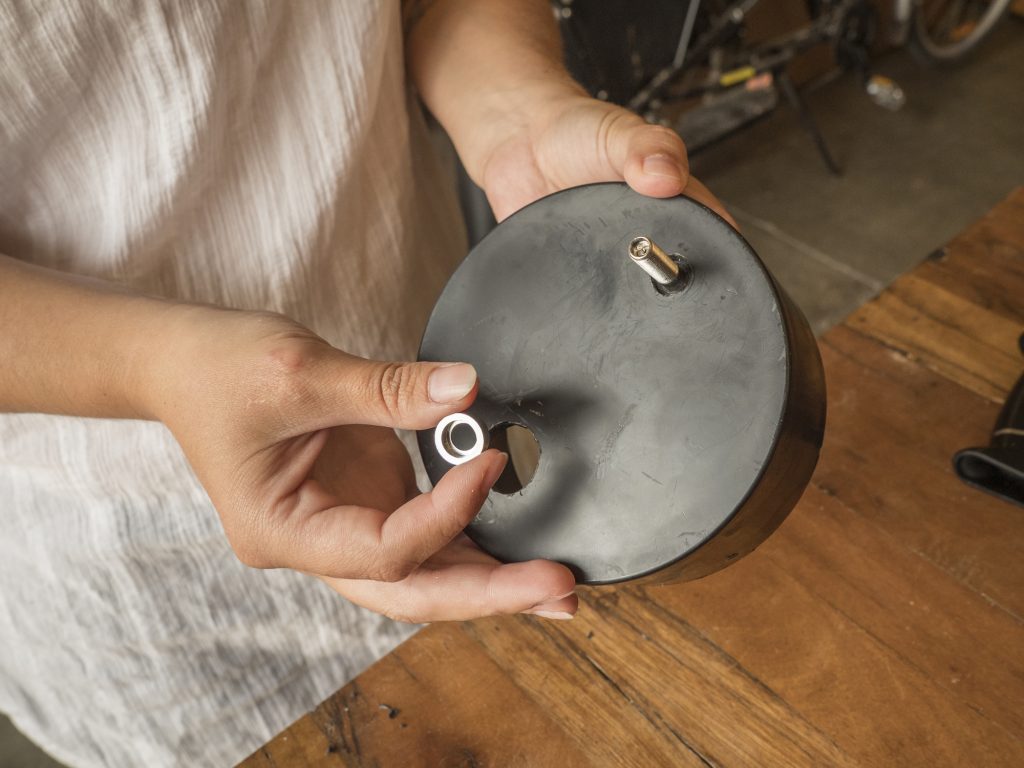 Schrader valve" width="1024" height="768" /> Step 6: Install the spigot. Place a rubber O-ring over the threads of the spigot. We used a round O-ring but a flat one would have been better. Apply a bead of silicone all the way around the bottom of the O-ring, then insert the spigot into the front face of the end cap. Holding it in place with one hand, apply another bead of silicone around the threads of the spigot on the inside face of the end cap to create an airtight seal. Screw the fastener onto the spigot hand-tight. Let the silicone cure according to package directions.
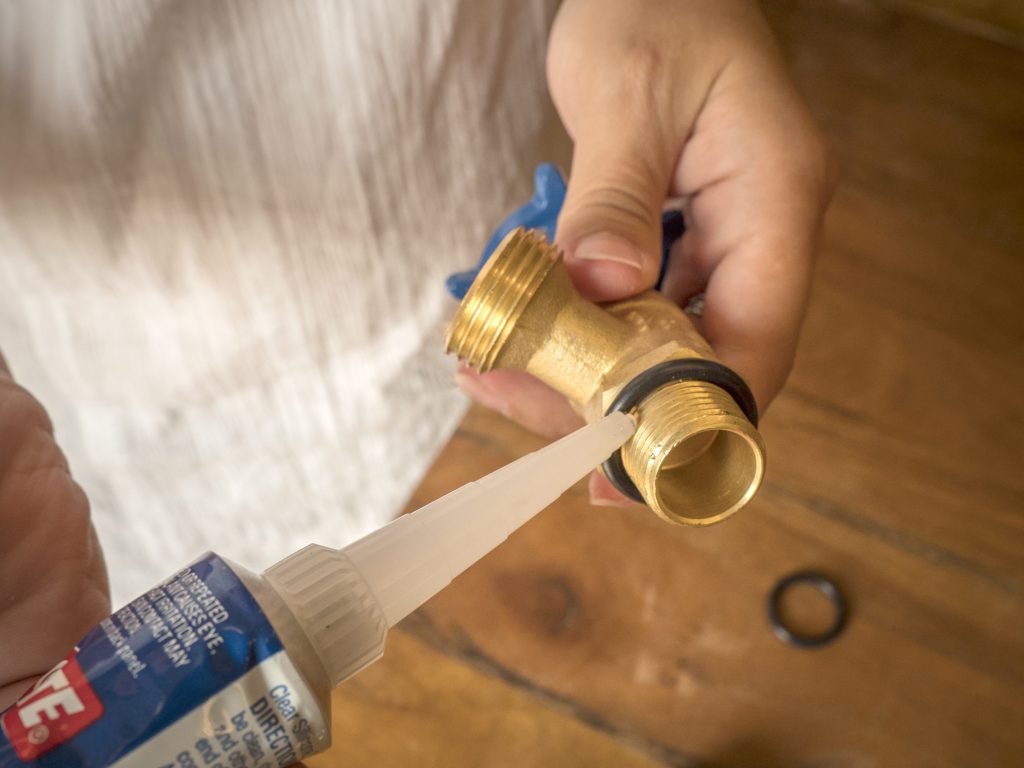
 Step 7: Assemble and glue the body of the shower. Use the sandpaper to rough up the edges of the pipe. In an area with good ventilation, use the ABS cleaner to clean and prime your pipes for gluing. Clean the outside ends of the 4″ pipes and the inside edges of the T-joint and the end caps. Working a piece at a time, apply ABS cement to the inside of an end cap, then to the outside of the pipe edge and press firmly together. Assemble pieces in the following order: Plain end cap, 5′ ABS pipe, T-joint, 6″ ABS pipe, end cap with spigot. Make sure to keep the end cap valve and the T-joint opening aligned at the ‘top’ of the shower and the spigot is pointing ‘down’. Let cement cure according to package directions.
 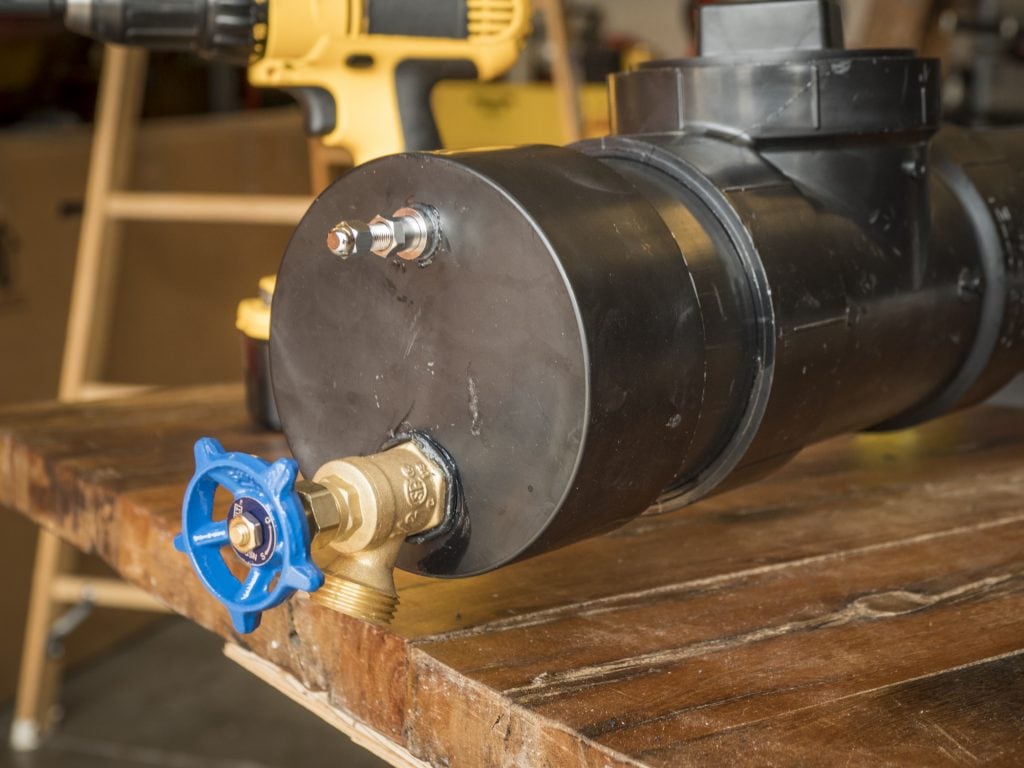 Step 8: Install on your car. Slide the foam blocks (if using) into your crossbars. Place the shower on top of the blocks, with the spigot end at the rear of the car. Use tie-down straps to secure the shower to the crossbars, with the spigot facing down. Alternately, secure the shower directly to the bars, with a friend holding the shower in place as you do so.
 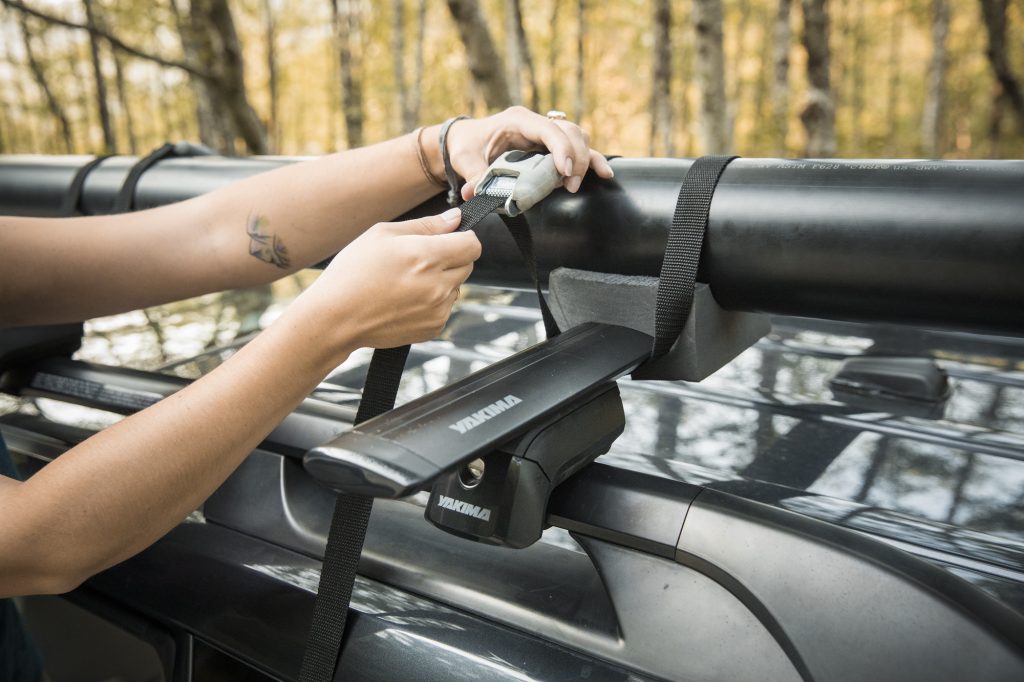 Step 9: Fill with water. Unscrew the cleanout cap on the T-joint opening. Using a hose or a jug, fill your shower with water once it is on top of your car. It will be too heavy to lift if you do this beforehand! Don’t fill it all the way; you need to leave space for the air to be pressurized. To ensure a tight seal, apply petroleum jelly to the threads of the cleanout cap and screw it back on hand-tight.
  Step 10: Pressurize the shower. Screw on the hose with nozzle to the spigot. Unscrew the Schrader valve cap and attach your bike pump or air compressor. Pump until the desired pressure is reached and screw the valve cap back on. Note: Do NOT go over your pipe’s pressure rating. We used about 30 psi, which is plenty for good water flow. You may need to re-pressurize depending on how long you use the shower.
 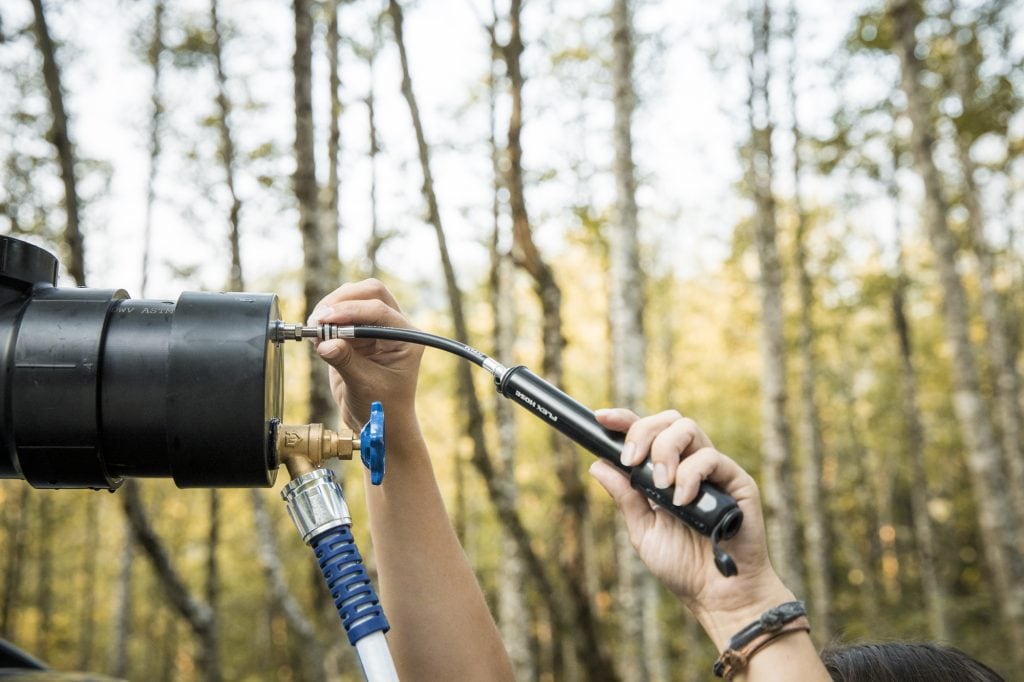 Step 11: Get clean! Open up the spigot and enjoy your new shower. The longer the shower sits in the sun, the warmer your water will be. Use for dirty feet, sticky hands, muddy pups, sweaty kids and anything else your heart desires. Make sure to follow Leave No Trace Principles wherever you use your new shower. Note: We don’t recommend drinking or cooking with the water from the shower.
 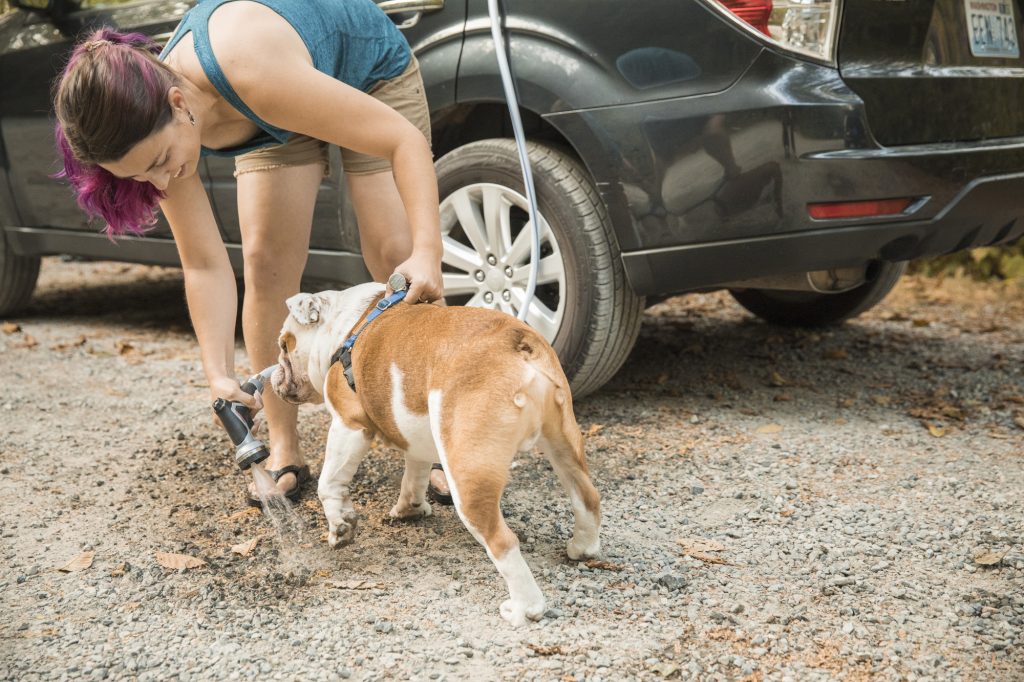 DIY camp shower in use washing off a dog" width="1024" height="682" />


Comments
Post a Comment